

If you have ever used a humidifier to help you with dry air, I do not have to tell you what a blessing and wonderful invention they are. However humidifiers can become quite a messy affair especially if you don’t know how to clean and maintain.
If not cleaned well, they develop mold, which they eventually release into your air and this can make you and your family sick. They also develop limescale which looks plain disgusting and can damage your humidifier if not dealt with properly and for these two reasons is very important to know “how to clean a humidifier”.
Accordingly, I wrote this post to show you how to effectively clean your humidifier. There are many guides out there but many of them focus on a specific type of humidifier but here I show you how to clean your humidifier no matter what type of humidifier you’ve got.
I start by explaining how often you should clean your humidifier, then I show you the tools and materials you need to clean a humidifier properly and thereafter I finally walk you through how to clean your humidifier under different scenarios and for your specific type of humidifier.
Read through this post and should be able to confidently clean your humidifier.
How Often Should You Clean Your Humidifier
An important part of cleaning a humidifier properly is knowing how often you should clean it. This largely depends on the type of humidifier you have. Some need to be cleaned more regularly than others and usually the cleaning frequency for your particular humidifier is indicated in your humidifier’s manual.
However if for whatever reason you don’t have access to your humidifier manual, here is some general guidance from my personal experience and research on how often to clean the common types of humidifiers you will find out there.
From what I have seen, most types of humidifiers should be cleaned on a daily and weekly basis if they are being used regularly. Now don’t get alarmed, the daily cleaning is a quick and easy process, however every week you have to do some intensive cleaning.
For most humidifiers, especially cool mist humidifiers, if you do not do the necessary daily cleaning, standing water in the humidifier will foster mold, mildew and sorts of unwanted bacteria which your humidifier will eventually spew into your air causing people to get sick.
To avoid all this, you have to clean your humidifier by getting rid of any water in its reservoir or tank and rinsing the tank every day. I have seen some people advise that you can do the daily cleaning process every 2 to 3 days instead of everyday if you have really good water quality but my take is to do it on a daily basis if you want to keep things as clean as possible.
As for the weekly cleaning, this is a deep clean to additionally fight mineral build up in your humidifier. Mineral build up wears out parts and can block your humidifiers nozzles reducing its effectiveness and your weekly cleaning routine helps you slow down and prolong your humidifiers life, especially if you use hard water in your humidifier.
If you think cleaning your humidifier daily or even weekly is quite a bother, one thing I have found helps a lot of people get the cleaning done is doing it before they actually run their humidifier for the first time everyday.
Just make sure that your humidifier cannot be turned on for the first time on a given day without emptying its water and rinsing its tank. Everything I have said so far largely applies to portable cool mist and warm mist humidifiers and the cleaning frequency story is slightly different for whole house and console humidifiers.
These humidifiers are usually less accessible than portable humidifiers in terms of cleaning. You could but it’s not practical cleaning them on a daily or weekly basis.
Often these humidifiers are fit into your furnace or HVAC system and you need to call a professional to get them cleaned properly and this is normally a monthly routine.
Furthermore, these types of humidifiers are now made with an automated daily flushing and cleaning system eliminating the need for you to clean them manually.
So, if you are getting a whole house humidifier, make sure to go for something one that has self cleaning features to keep your humidifier as clean as possible and subsequently the air in your house.
Materials and Tools Used For Cleaning Humidifiers
If you’ve understood the ins and outs of how often you should clean your humidifier, the next thing I think is important to understand is what tools you need to clean your humidifier.
My focus here and in the rest of this post is on portable humidifiers but I will mention whole house humidifiers a bit here and there in case anyone is curious about how whatever I’m sharing applies to them.
The process of cleaning your humidifier mostly entails scrubbing and disinfecting. There are a variety of disinfectants, cleaning chemicals and brushers you can use but some can be harsh and damage the material your humidifier is made of.
Based on this, my humidifier cleaning tools and materials list also includes some less harsh cleaning tools and chemicals in case you have a humidifier made of materials that are sensitive to the harsher type of cleaning chemicals and tools.
Hydrogen Peroxide
One of the most common disinfecting chemicals used when cleaning a humidifier is hydrogen peroxide. The disinfectant is used to clean parts of your humidifier that are prone to bacterial and mold growth and this is for the most part it’s reservoir/tank.
For a standard humidifier tank, you usually need about 1 to 2 cups of 3% hydrogen peroxide. However, be careful with hydrogen peroxide as it’s one of the harsh chemicals that can react with certain plastics and materials that some humidifiers are made of.
White Vinegar
White vinegar is another common disinfecting chemical used for cleaning humidifiers. It’s great because it is also a powerful solvent especially for limescale/mineral build up. However it is another corrosive chemical that can potentially cause damage if your humidifier is made of sensitive material.
One to two cups of white vinegar should suffice for the usual portable humidifier. I have also found that you need vinegar with at least 6% acidity to effectively kill bacteria and mold and dissolve limescale on your humidifier.
Bleach
The final common and also harsh disinfectant for cleaning humidifiers is bleach. Bleach has long been proven to kill all sorts of microorganisms including fungus, bacteria and viruses.
To use bleach you have to mix one teaspoon of it per gallon of water (about 3.8 litres). Then you can use as much as you need of it in your humidifier. If you don’t mix it with enough water it can burn through certain materials especially metal and it can be lethal if you touch or inhale it. So be extra careful with bleach.
Anti-Mold Spray
If you have assessed that your humidifier is made of sensitive material and won’t work well , then the best option for you is an anti-mold spray. There are so many options.
Two great bleach free examples include Concrobium 27400 Mold Control Aerosol, 14 Oz and CLR Mold & Mildew Clear, Bleach-Free Stain Remover which are both available on Amazon. You simply spray or pour these on your humidifier reservoir and rinse afterwards.
Detergent
Once you have disinfected your humidifier or before you do, as the disinfectants may not be effective at removing some grime and stains around your humidifier, it’s a good idea to use some liquid or powder soap to help with this before or after using a disinfectant chemical.
Dishwashing liquid should work but you can go for something more specialized if you have tough dirt around your humidifier. That said with detergents and disinfecting chemicals too, unless the manufacturer says you can, do not use them on your humidifiers wick as this can destroy the antimicrobial finishing placed on the wick when it was manufactured.
Water
To state the obvious, you will need water to rinse all the soap and chemicals off your humidifier when you are done scrubbing.
Cleaning Brush & Sponge
For scrubbing your humidifier, dish washing sponges, soft bristle scrub brushes, toothbrushes and glass cleaning brushes will serve you well. Soft bristle and glass cleaning brushes come in handy as they preserve the aesthetics of your humidifier by preventing you from scratching glass or glass like surfaces on your humidifier.
Furthermore, to get into the tiny spaces and corners, I have found it’s also a good idea to have some Q-tips on hand and a cleaning brush set like this one on Amazon with tiny brushes that can fit through tiny pipes and straws..
Towels
When cleaning your humidifier, you certainly can’t do without a towel. You will need towels for wiping off dirt and towels for drying your appliance once you are done cleaning it. You can use any type of towel but I would go for something non-abrasive. I believe a great option when it comes to microfiber cloths is Water Liberty’s Nano Towel.
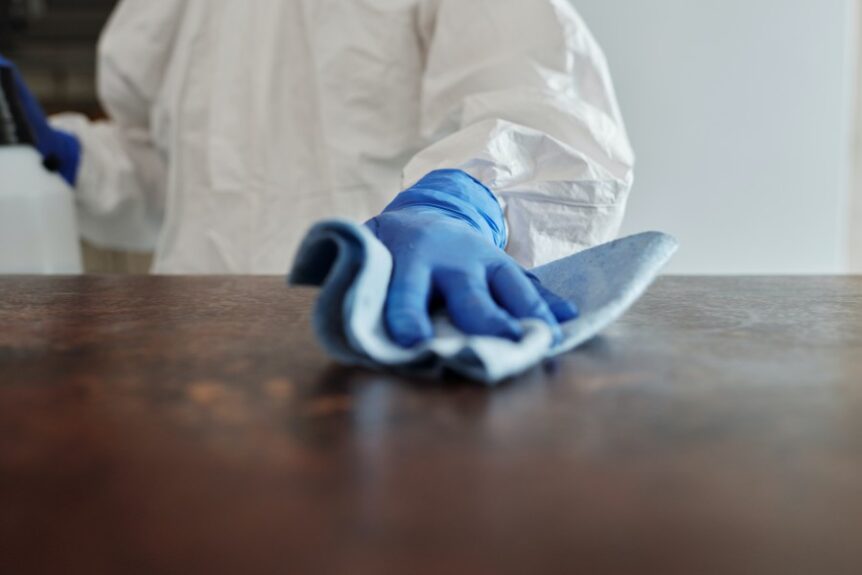
Gloves
As you will be handling some harsh chemicals, you will need some cleaning gloves when cleaning your humidifier.
Screw Drivers
Some humidifiers may have tanks/reservoirs that may need unscrewing before you take them apart so it’s a good idea to have a tool box with a set of screwdrivers ranging from very small to large on hand just in case.
Cups And A Bucket
Lastly, to measure, and hold cleaning chemicals, have some designated cups ready on the side. Also have a bucket or two where you can mix chemicals or detergents with water and soak some parts of your humidifier.
On this note, these are all the tools and materials you need to clean almost any type of humidifier you’re likely to come across properly.
Humidifier Cleaning Approaches
Having taken you through what tools you need and how often you should clean your humidifier, I can finally explain to you how to do the actual cleaning. All humidifiers follow pretty much the same general cleaning process.
However, if your humidifier has a wick or heating element or you have a furnace or HVAC based humidifier, there are some additional cleaning steps you have to take. Also, as I alluded to earlier, with most types of humidifiers you will have a daily and weekly cleaning routine which differ in intensity.
Due to the nuances between devices, there are slight differences in the way each type of humidifier is cleaned. That said there is a general cleaning approach that applies to each type and I touch on the main approaches of cleaning them here. So, let me show you the general cleaning approach first.
General Humidifier Cleaning Approach
Step 1. Switch Off And Disassemble Your humidifier
Before I do any humidifier cleaning, the first thing I make sure I do is switch off and unplug my humidifier to avoid getting electrocuted. Once I have done that then I disassemble my humidifier.
For most humidifiers you will be able to easily pull apart their water tank, reservoir, humidifier base, filters, discs, fans and nozzles from the humidifiers main body. However some may need some unscrewing to take apart some parts.
Once you have carefully taken apart your humidifier and neatly placed the various parts on a table top or on some clear surface somewhere so that the parts do not get lost, you are ready for the next step.
Step 2. Soak, Scrub and Rinse Your Humidifier
Once you’ve taken apart your humidifier, the next step is to soak the parts with no electronics on them. If you soak the parts with wiring, circuit boards or bulbs on them, you can damage your humidifier.
Furthermore, you only really need to soak your humidifier’s parts if they have mineral build up, noticeable mold growth or tough stains on them. You can soak your humidifier’s parts in a bucket or large enough tub for 15 minutes to about an hour in any of the chemicals I listed in the cleaning materials and tools section.
Whether you use bleach, vinegar, hydrogen peroxide or anti-mold spray, these will kill any bacteria or germ growth on the parts you soak. However to deal with (limescale) mineral build up, you have to soak your humidifier parts in vinegar.
So in case you are trying to get rid of both mineral build up and mold, your go to chemical is vinegar. If you want to use bleach as well, do not mix it with vinegar. The mixture is highly corrosive and dangerous and will harm you.
Rather soak the concerned parts of your humidifier in vinegar first to get rid of the limescale then rinse and soak them again in any other chemical disinfectant you wish to soak them in.
Then if your humidifier has a base with a reservoir, do not soak the base but rather place your disinfecting chemical or vinegar in the reservoir to disinfect and descale the reservoir’s surfaces.
Using some labeled cups, preferably measurement cups, make sure to dilute all chemicals with water as recommended before soaking anything to avoid damaging your humidifier or harming yourself.
Since you are dealing with chemicals that could potentially harm you, also make sure to wear cleaning gloves throughout the soaking and rinsing process. Once you are done soaking, it’s time to scrub.
Use q tips or the tiny cleaning brushes I showed you in the materials and tools section to get to the minute corner of your humidifier and scrape out any hard to reach dirt. If the limescale or stains on any soaked parts of your humidifier have softened enough, they should easily come off when you scrub them.
Once you are done scrubbing, rinse the chemicals on all the parts of your humidifier and then use detergent to scrub the parts once more and then rinse and wipe everything dry and let everything air dry for at least 30 minutes.
For the outside of your humidifier, if it’s very dirty you can also scrub them with detergent as well and then rinse and dry while making sure to avoid getting water on any electronic parts. Otherwise, all you have to do is simply wipe your humidifier’s external body clean with a damp cloth and let it dry.
In all your scrubbing be sure to use soft bristled brushes and non abrasive materials to avoid scratching your humidifier.
Step 3. Reassemble Your Humidifier
To state the obvious, once everything is dry the final step is to put your humidifier back together ready for its next use.
These 3 steps are all the steps you will generally take in cleaning most humidifiers. I must mention however that the steps are deep cleaning steps. For light cleaning, after step 1, you only have to take out your water tank from your humidifier, scrub it with preferably an antibacterial detergent then rinse, dry and put it back.
Cleaning Humidifiers Daily
A question I see often when it comes to cleaning humidifiers is what kind of cleaning a humidifier needs on a daily basis. On a daily basis, your humidifier needs a light clean as I described in the general cleaning approach section.
Before you use it every day, quickly take out its water tank, scrub it with soap, rinse, dry with a cloth and put it back. If you notice dirt on the external part of your humidifier then you can also wipe the dirt off. That way you avoid tough stains on your appliance.
Cleaning Humidifiers Weekly
When you finally get to your weekly humidifier cleaning, you will have to deep clean your humidifier as I described in the general cleaning approach section. This way you do not give mineral deposits or mold a chance to develop.
Sometimes you may find your humidifier is quite clean when it is due for its weekly clean. In such cases I would skip doing a deep clean and do a daily clean instead. However if you do notice the surfaces in and around your humidifier tank or reservoir getting slightly slippery or slimy, you better do a deep clean before things get really messy.
Cleaning Humidifiers That Have Wicks
One of the common nuances I stumble upon when cleaning humidifiers is the cleaning process of a wick if you have a humidifier with a wick. Though many humidifier wicks come with an antimicrobial coating, they are notorious for harboring bacteria and limescale.
Accordingly, a lot of wick filters are made to be replaced every couple of months rather than being cleaned. That said, for wicks that can be cleaned, do not soak the wick in bleach or wash it with detergent as this will destroy the wick’s antimicrobial surface.
To clean the wick, all you have to do is rinse it under cold running water and this should get rid of any limescale build up on it. Next simply leave the wick to dry in the sun or gently dry it with a blow or hair dryer.
If mold and bacteria have not grown on your wick yet, drying it helps to kill off any such organisms. If you notice mold, then you are better off just replacing your wick. Taking this into account, you may come across wicks that can be washed in harsh chemicals.
If that’s the case for you, then the process is to simply soak the wick as you would when deep cleaning other parts of your humidifier then rinse it and give it a hand wash with soap as you would hand wash clothes and let the wick dry.
However, every wick has a useful life, and if your wick gets crusty with mineral deposits and becomes smelly and moldy, don’t bother cleaning it. Just replace it.
Cleaning Humidifiers That Have Heating Elements
The cleaning process for humidifiers with heating elements is exactly the same as the general humidifier cleaning approach except for when it comes to cleaning the heating element.
The heating element quickly gets coated with limescale if you use hard water in your humidifier and accordingly needs weekly/monthly cleaning to prevent it from getting damaged.
To clean the element, you have to soak it in vinegar for 20 minutes to an hour. Usually the element is in the reservoir and some humidifiers have removable elements. If it is in a reservoir and not easily removable, pour your vinegar mixture in the reservoir.
If you can remove it, then rather soak it in a bucket. As your humidifier soaks in the vinegar, swirl the mixture around in the tub or reservoir to make the vinegar penetrate the limescale. Once the limescale is soft enough, and easily scrapes off, then you can scrub your humidifier’s heating element with soap and rinse it clean.
Cleaning HVAC Humidifiers
The final unique humidifier cleaning situation you might be in is cleaning an HVAC or Furnace humidifier. As with portable humidifiers, your whole house duct based humidifier is not exempt from regular cleaning.
Duct based humidifiers are even more prone to bacterial infestation than portable humidifiers as they are usually in a place where they get very little sunlight. Most use treated water and so limescale may not be a big issue but mold if they are not cleaned mold can quickly develop on your humidifiers filter or reservoir and get transmitted through your entire home.
To clean duct based whole house humidifiers, you usually have to open up your humidifier and pull out some components which mostly include filters and heating elements.
Once you pull these out, you deep clean them as I described under the general cleaning approach section and put them back in your humidifier. As with portable humidifier filters and wicks, eventually you have to replace your whole house humidifier filters.
On this note, I think I can say I have shown the fundamentals of cleaning humidifiers and if you have read carefully through the sections that apply to you, you should now be able to safely keep your humidifier clean. If you have any questions, criticisms or remarks, please feel free to leave a comment below and let us discuss.
Additional Useful Tips To Keep Your Humidifier Clean
To make cleaning humidifiers an easy process, I have come across a couple of handy tips that I think you’ll find useful too when you try them out. If you are not using any of these, I suggest you start using them as they will save you a lot of hustles cleaning.
1. Use demineralized water
The main reason limescale builds up in your humidifier is because of minerals naturally found in tap water especially if you live in an area with hard water. However if you got rid of the minerals in your water, you would get barely any mineral build up in your humidifier.
Accordingly you would barely need to do any limescale cleaning on your humidifier’s components. But how do you demineralize water? Well you have several options.
You can get a countertop water distiller or a whole house water softening system so that you always get safe drinkable demineralized water from any tap in your home.
Another approach is to use demineralization cartridges which you simply place in your humidifiers water tank but I have seen enough complaints about their long term use that I almost always point people to either a water distiller or whole house water softener system.
Get any of these systems and you won’t really have to worry about cleaning limescale on your humidifier and anywhere else mineral deposits build up across your home.
2. Don’t let water sit in your humidifier tank
When you are not using your humidifier, try as much as you can to keep its water tank empty and dry. By doing this, you greatly avoid mold growth and save yourself time spent scrubbing mold off your humidifier and disinfecting it.
Keeping your humidifier dry to avoid mold also applies to when you want to store it. Before you put away your humidifier for an extended period, be sure to check that all its components are completely dry to avoid mold and mold stains that later have to be cleaned when you next want to use your humidifier.
3. Read Your Humidifier’s Manual
If you do not have your humidifier’s manual, for most humidifiers you can find the manual online. I cannot stress this point enough, the best cleaning guide you will find for your humidifier is from your appliance’s manual.
Your manual is the first place to turn to for cleaning details if you do not get enough detail from general cleaning guide’s like mine. You will avoid a lot of mistakes, and save time figuring out how to take apart and reassemble your humidifier.